


HubSpot Marketing Hub Dashboard Setup Guide
Get started with HubSpot Marketing Hub dashboards in minutes.
In this setup guide, we’ll show you how to customize and configure HubSpot Marketing Hub metrics for your Numerics dashboard with real-time notifications in 3 easy steps:
Step 1 - Choose HubSpot Marketing Hub from the integrations list in Numerics.
Step 2 - Choose a pre-designed KPI Template.
Step 3 - Connect your HubSpot account and add the KPI.
Let’s jump in!
Step 1:
Choose HubSpot Marketing Hub from the integrations list in Numerics.
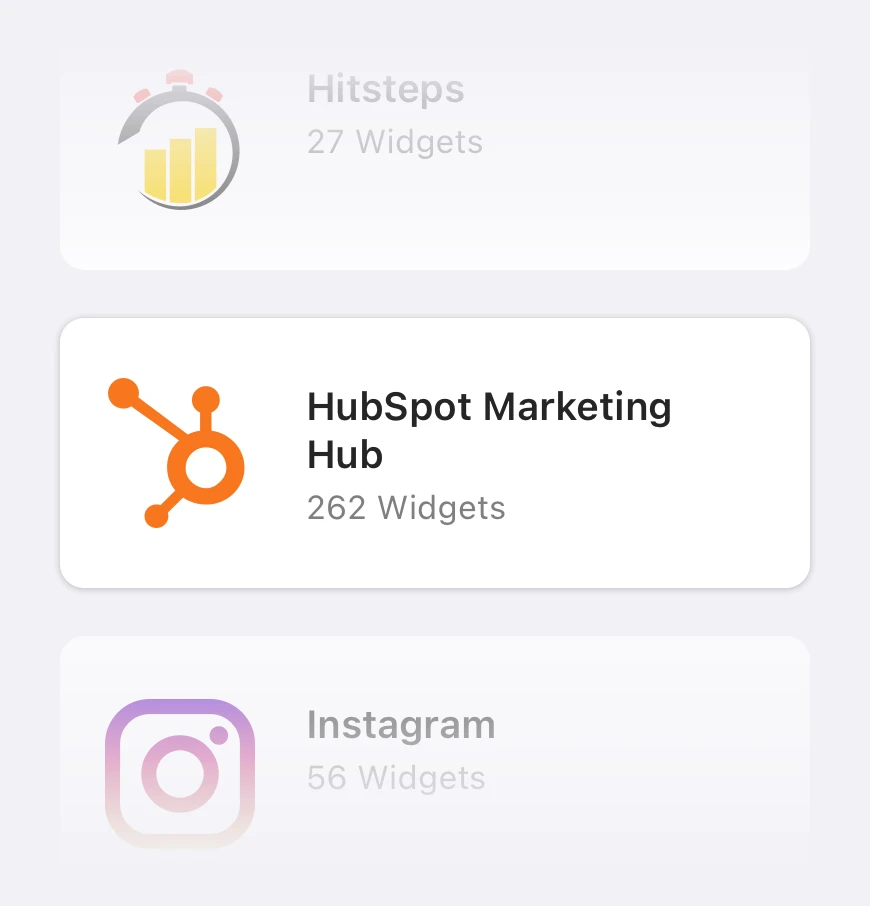
Launch Numerics on your Mac, iPhone, or iPad. Use the ‘+’ in the top right corner of a dashboard to choose HubSpot Marketing Hub from the list of integrations.
Step 2:
Choose a pre-designed KPI Template.
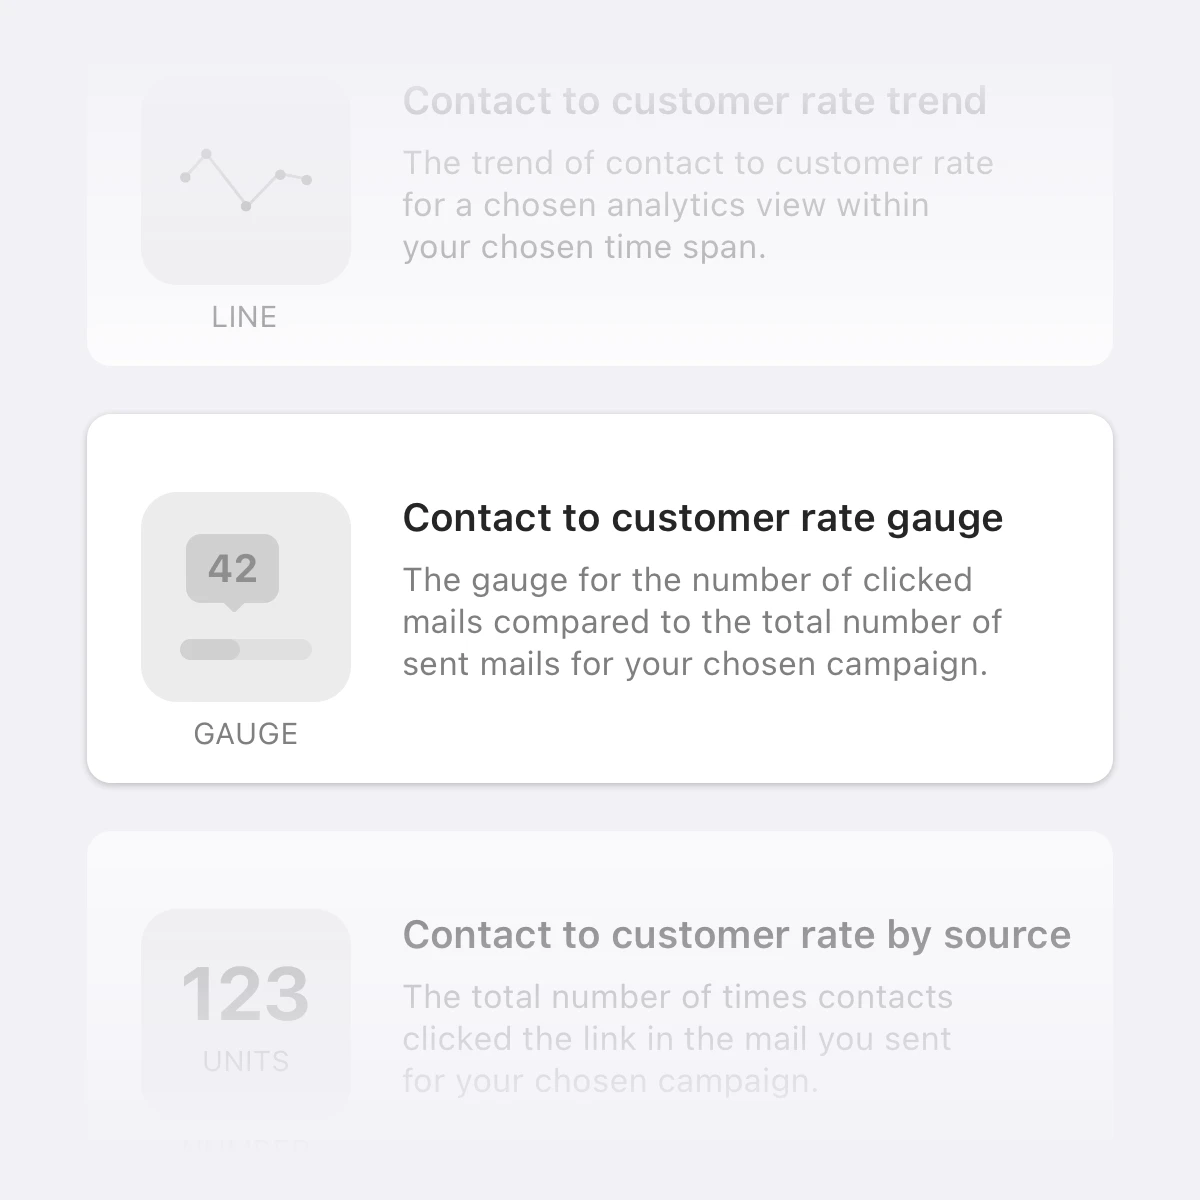
In the HubSpot Marketing Hub widgets list screen, browse the pre-designed KPI templates and tap/click on a metric you want to measure on your dashboard.
Step 3a:
Connect your HubSpot account.
The KPI widget’s Edit Screen pops up for you to connect and add it to your dashboard.
Follow the steps below to first add your HubSpot account:
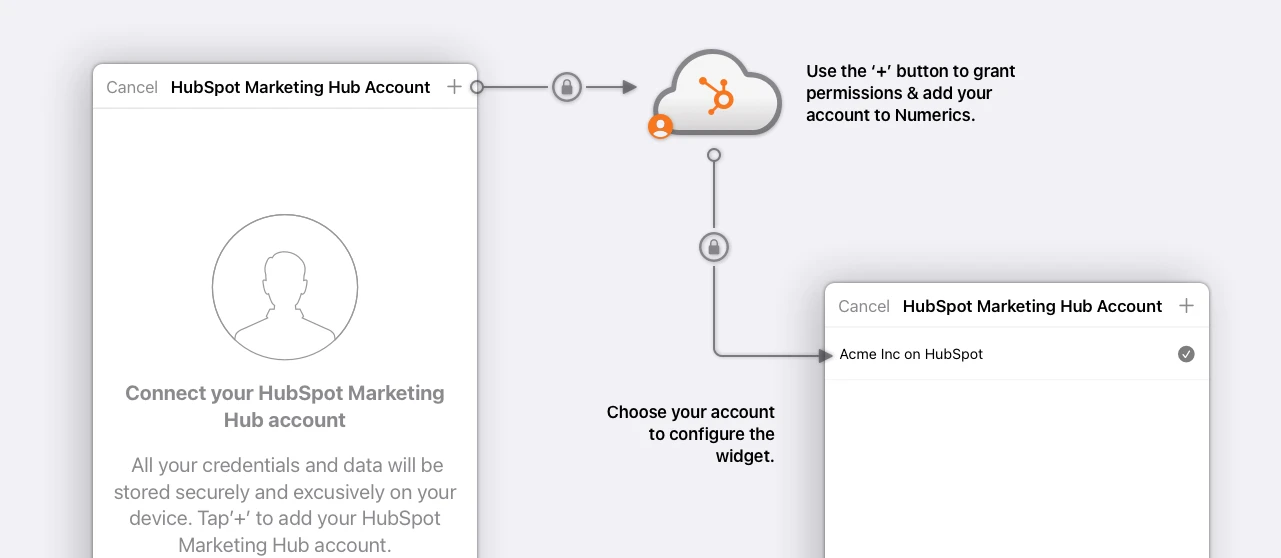
Tap on Choose Account.
Tap/click on the ‘+’ button.
You’ll be redirected to HubSpot’s OAuth 2.0 authentication page. Enter your HubSpot account credentials and grant Numerics the required permissions.
Once authenticated, you’ll be redirected back to the Numerics app. Hit Next to save the newly added account and choose it to associate it with the KPI widget.
Note: This is a one-time process. The next time you choose an HubSpot Marketing Hub KPI widget, it will automatically select this account.
Step 3b:
Configure the widget.
Add in other details to configure the widget for your dashboard:
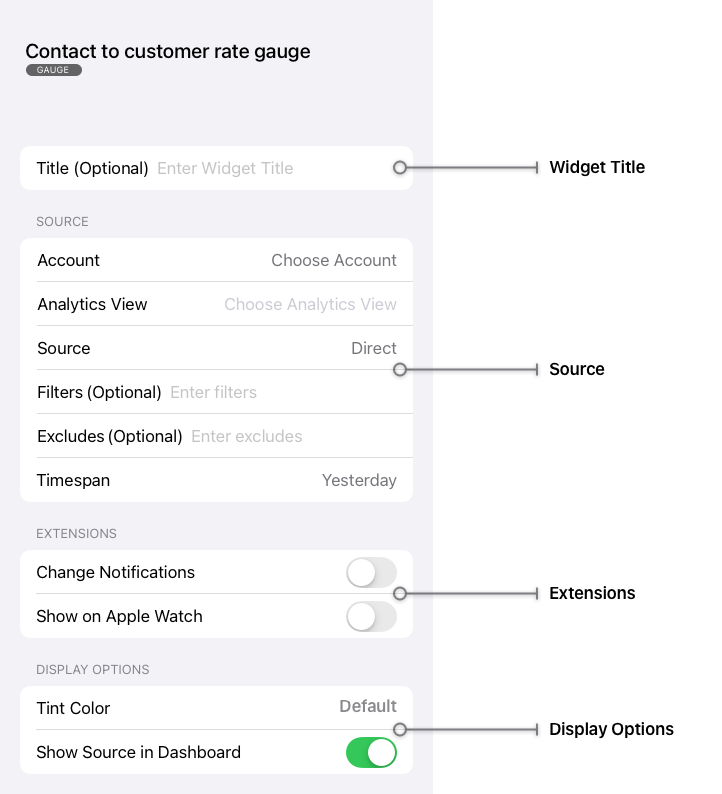
Title: Add a suitable title for the widget. If left blank, the widget displayed on the dashboard will use less vertical space.
Note: The title is helpful to find the widget easily when adding it to the notification center/home screen/lock screen widgets on your Mac & iOS devices. The interface will automatically choose the default title displayed in its template if empty.
Objects: The associated objects your account has permissions to, will be auto-populated - e.g., Analytics View. Tap/Click to choose the object you want to track metrics for.
Extensions: Customize how you’d like to be notified of changes to this metric.
a. Turn on Change Notifications to get notifications on all devices.
b. Turn on Show on Apple Watch to see the widget on your wrist.
Display Options: Finally, customize the appearance of the widget on the dashboard.
a. Tint Color - Choose a color to add a tint to the visualization. Color options include Red, Orange, Purple, Green, and Default (Blue).
b. Show source in dashboard - turn this on to display the HubSpot logo and object name in the Source Footer of the widget on the dashboard.
Hit Save. And the widget is now available for tracking on your dashboard.
